Hey everyone, I’m Jake, and I’ve been running a slitting machine supply business for almost a decade now. Most days, I get calls from folks panicking because their slit materials come out with ragged edges—you know, the kind that slow down production, ruin finished parts, and make customers send stuff right back. It’s such a frustrating problem, and way more common than you’d think. Today, I’m breaking down exactly how to fix the edge quality issue with your slitting machines—stuff I’ve learned from working with hundreds of customers, not just textbooks. No fancy jargon, just what actually works. Slitting Machine
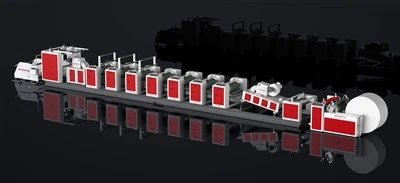
First off, let’s get one thing straight: slitting edge quality isn’t just about sharp blades. I see so many guys grabbing a new blade and slapping it on, only to have the same bad edges a week later. It’s a whole system. But let’s start with the blade itself because that’s the first line of defense. A lot of people skip the prep here, which is a mistake. When we send out slitting blades, we always tell customers to do a “break-in” instead of slapping them on and running at full speed. Wait, break-in? Yeah, it’s not just for car engines. New blades have tiny microscopic burrs or uneven edges from manufacturing, and if you crank them up straight away, those burrs will tear your material instead of shearing it. I usually recommend a test run with a scrap roll of your actual material—run it at 20-30% of your normal speed for 5 minutes, then bump it up gradually. That smooths the blade edge just enough to get a clean cut.
Then there’s blade clearance. This is the big one I see messed up more than anything. Clearance is the tiny gap between the top and bottom slitting blades, right? If it’s too big, the material gets pinched and stretched, leading to ragged edges. If it’s too small, the blades grind against each other, wear out fast, and can even dull prematurely. The problem is, there’s no one-size-fits-all clearance—it depends entirely on the material you’re slitting. For thin stuff like 0.1mm aluminum foil, you want clearance around 5-7% of the material thickness. For thicker steel at 2mm, you’re looking at 10-12%. Most modern slitting machines have a quick-adjust clearance feature, but a lot of operators just leave it set to whatever was used last month for a different material. That’s a lazy mistake. I tell my customers to keep a little cheat sheet taped to the machine: list every material they run, its thickness, and the exact clearance they need. It takes 2 minutes to adjust each time, and it cuts edge defects by like 70% for most people.
Wait, let’s talk about blade condition, not just new vs. used. A lot of operators wait until the blade is obviously dull—like when edges start curling or tearing—before replacing them. But by then, you’ve already wasted hundreds of pounds of material. How do you tell a blade is going bad before it’s too late? Listen to the machine. If it’s making a high-pitched whine instead of a smooth, low hum when running, that’s a sign the blade is dull. Or check the edge of the slit material: if the burr (that tiny extra bit of material left on the edge) is more than 0.05mm, it’s time for a blade change. I usually advise replacing slitting blades every 50-100 hours of run time for most materials, but again, it depends. Some tough materials like stainless steel will wear blades way faster than soft PVC. Also, don’t mix blades for different materials—running a blade used for paper on aluminum is a quick way to ruin both the blade and your product.
Now, let’s move to the machine itself, not just the blades. The slitting lines, those round holders that the blades mount on—if they’re worn or misaligned, nothing else matters. I’ve seen machines that are 15 years old, and the slitting lines have a tiny groove from years of use. When you mount a new blade on a grooved line, it doesn’t sit flat. That causes the blade to tilt, so one side cuts too deep and the other doesn’t cut enough, leading to uneven edges. How do you fix that? If the groove is minor, you can resurface the slitting lines yourself with a fine grinding stone (just make sure to get them balanced after, or you’ll have vibration problems). If it’s bad, replace the lines— it’s a $200 part that saves you from wasting $1000s in material.
Alignment is another big one. Both the top and bottom blades need to be perfectly in line with each other. Even a 0.1mm tilt can throw off the entire cut. Most machines have an alignment tool, like a feeler gauge or a laser alignment kit. I know a lot of guys think “that’s for maintenance guys, not me,” but spending 10 minutes aligning the blades every week is way easier than fixing edge defects for days. Pro tip: run a scrap roll and check the edge with a magnifying glass after aligning. If you see a straight cut, you’re good. If not, tweak the alignment a little more.
Then there’s tension control. Wait, tension? How does that affect edge quality? Let me explain. If you’re slitting a roll of material, the tension has to be just right. Too much tension, and the material stretches when it goes through the slitter—so when you cut it, it shrinks a little, leading to uneven edges. Too little tension, and the material is loose, so it bounces around, making the blade skip or not cut straight. I see this all the time with flexible materials like plastic film or fabric. For those, I usually recommend setting the tension to around 15-20% of the material’s tensile strength. For rigid materials like metal, it’s a bit higher, 25-30%. But here’s the thing: tension changes with roll diameter. When a roll is full, it’s heavier, so you need less tension. When it’s almost empty, you need more tension to keep it tight. Most modern slitting machines have automatic tension control, but a lot of people turn that off and set a fixed tension. That’s a mistake. I always tell my customers to use automatic tension—it’s worth the extra $500 if it means better edges and less waste.
What about material prep? A lot of people ignore this, but if your incoming material is bad, your slitting edges will be bad. If the original roll has wrinkles, or is warped, or has uneven thickness, the slitter can’t fix that. For example, if a metal sheet is 0.5mm thick in one spot and 0.55mm in another, your blade clearance is set for 0.5mm, so the thicker spot won’t cut properly. How to fix that? Inspect incoming rolls before you put them on the slitter. If there’s a slight warp, you can run it through a leveling machine first—again, a small investment that pays off in better edges. Also, make sure the roll is centered on the slitter’s unwind stand. If it’s off-center, the material will pull to one side, making the blade cut unevenly.
Wait, let’s not forget about lubrication. A lot of folks over-lubricate or under-lubricate. For metal slitting, you need a light lubricant to keep the blades cool and reduce friction, which prevents burrs. But if you use too much, it can leave residue on the edges, and if you use the wrong kind, it can react with the material (like with some plastics). For non-metal materials, you usually don’t need lubrication, but if you’re running something sticky like adhesive tape, a light dusting of talcum powder can prevent the material from sticking to the blade. I see a lot of people skipping lubrication for metal, which leads to blade overheating, dulling, and ragged edges. It’s a 5-minute step that makes a huge difference.
Let me share a real customer story to make this concrete. A couple months back, a guy who runs a custom packaging shop called me panicking. He was slitting plastic film for snack bags, and the edges were so ragged that 10% of his product was getting rejected. He’d already bought 3 new blades, tried adjusting his machine, but nothing worked. When I asked him about clearance, tension, and material prep, he admitted he was using the same clearance for every film thickness, left tension on fixed setting, and never checked incoming rolls for wrinkles. I walked him through the steps: adjust clearance for each thickness, switch to automatic tension, inspect rolls, and do a blade break-in. A week later, he sent me a message saying his rejection rate dropped to 1.5% and he saved $3000 in a month. That’s the kind of win I live for.
Now, let’s talk about common mistakes I see new slitting machine owners make. First, buying a cheap, generic blade to save a buck. Yeah, a $20 blade vs. a $50 one, but the cheap one dulls in 10 hours, and you waste material. Second, not training operators on the machine. A lot of shops hire a guy who’s never used a slitter before and just tells him “make it run.” Edge quality is operator-dependent—someone who knows how to adjust clearance and check blade condition will get way better results than someone who just pushes a button. Third, skipping regular maintenance. A slitting machine needs a tune-up every 6 months, just like a car. Tighten bolts, lubricate moving parts, check slitting lines for wear—small stuff that prevents big problems.
Wait, what if you’ve tried all this and still have bad edges? Then it’s probably a machine-specific issue. Maybe your slitter is too small for the materials you run, or the blades aren’t compatible with your line. That’s where I come in—our team specializes in troubleshooting slitting machines, and we can help you figure out if you need a part replacement, a machine upgrade, or just a tweak to your process.
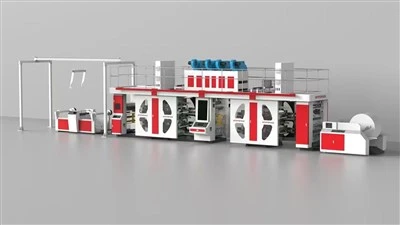
At the end of the day, improving edge quality isn’t rocket science—it’s about paying attention to the details. It’s not just about blades, it’s about clearance, alignment, tension, machine condition, and even incoming material. I’ve spent years refining these steps, and they work for everything from thin foil to thick steel, from plastic film to fabric. If you’re dealing with ragged edges, wasted material, and production delays, you don’t have to figure it out alone. Our team is here to help you diagnose the problem and find the right solution for your shop. Whether you need a quick adjustment, a new slitting blade, or even an upgrade to your slitting machine, just reach out to our team to connect and discuss your specific needs. We’re always happy to help fellow manufacturers get their slitting process running smoothly.
Flexo Printing Machine References:
- Slitting Technology Handbook, 2nd Edition, Society of Manufacturing Engineers, 2018.
- "Edge Defect Reduction in Slitting Operations", Journal of Manufacturing Processes, Vol. 27, No. 1, 2019, pp. 112-120.
- Practical Guide to Slitting Machine Maintenance, Industrial Press Inc., 2021.
- "Tension Control for Precision Slitting", International Journal of Advanced Manufacturing Technology, Vol. 105, No. 9, 2019, pp. 3875-3883.
Wenzhou Haidobao Machinery Technology Co., Ltd.
As one of the most professional slitting machine manufacturers in China, we have world-leading production equipment and strong manufacturing capabilities. Please rest assured to wholesale durable slitting machine for sale here from our factory. All customized machines are with high quality and competitive price.
Address: No. 116, Xinglong Road, Wanquan Town, Pingyang County
E-mail: 214949666@qq.com
WebSite: https://www.hdbmachinery.com/
